|
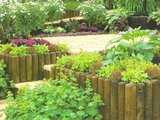
Raised Bed PlantersRaised bed planters make raised bed planting a piece of cake. There is a wide variety of planters to choose from with regards to size and shape. You can also use that to your advantage by being creative whether it’s forming an unusual shaped bed or a unique raised bed design. 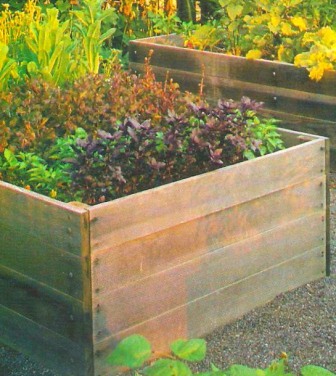 It all depends on how you want your raised garden to look. Here are some quick and easy instructions for setting up raised bed planters in your garden…. Easy Raised Bed Planting GuideFirst before you begin, here’s a short list of what you’ll need…
And a
Ok now that you have your list let’s get going. Step 1- Allocate a nice area for your raised garden planter. Choose an area that is exposed to some sun and where the ground is well-leveled. Step 2- Use the garden hose and place it on the ground to identify the edges of the planter. The planter allows you to be flexible as you can have it any shape you want. That’s where your creative skills will come in. Step 3- Use the retaining wall blocks to form a line beside the garden hose. Place them flat and from one end to another beside the whole length of the garden hose. Step 4- Use the masonry saw blade to cut a retaining block in half. Place the half piece on top of the first layer of blocks on the far left of the wall. Create another layer using the full size blocks by placing them on top of the first layer. Continue to do that until you’ve reach the end of the first layer. Step 5- Keep adding layers of blocks until your raised bed is about 10 to 18 inches tall. Step 6- Fill up the inside of your raised bed planters with some top soil until it’s within 5 or 6 inches of the top. The space on top is to accommodate mulching after planting your vegetables. The New Features in Vegetable Bed PlantersSome planters come with trim packs that are designed to give that well-completed appearance. They’re also well durable I must say. The trim pack basically consists of wide top rails at about 4 inches that are connected to the top of the planter. They’re also convenient in that you can rest your tools on them while doing your raised bed gardening activities. These trim packs are quite new. There’s also a set of side and corner trim pieces that can assist in stabilizing your bed along with providing protection against moisture. These top rails can be bought separately. When they are assembled, they add to the height as well as the outside measurements of the planter. If you garden on your rooftops or patios, you can use the new planter bottoms. These planter bottoms consist of narrow pieces that are cut and evenly spaced out on supportive struts. Not only does the support raise the planter a little above the ground, but also supplies good drainage especially on surfaces like concrete. They’re made of good quality cedar. You can buy them pre-assembled to make the building process an easy task.
|