|
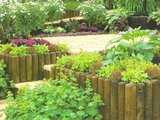
DIY Building Raised Beds GuideBuilding raised beds are pretty straightforward and reduces cost as well. I like creating raised beds for so many reasons. They’re ideal even if you experience soil problems such as compacted, clay or sandy soils and they also supply good drainage for your plants. The good news too is that the soil warms up quickly so that you can plant earlier. As the soil is not usually walked upon, it remains loose to allow easier root penetration which is very important. When I now decided to start raised beds, I wasn’t really sure of the best type of soil to use. So I did some research and that’s where I found out that you can fill your beds with particular types of soil to suit specific vegetable plants. You can also use concentrate water and fertilizer as often as required. Techniques for Building Raised BedsHere’s a cool idea that I got from my friend…She uses hardware cloth foils gophers to line the bottom of the bed. Now gophers tend to feed on plant roots from tunnels beneath the soil. So this is a good solution towards keeping gophers and moles away. 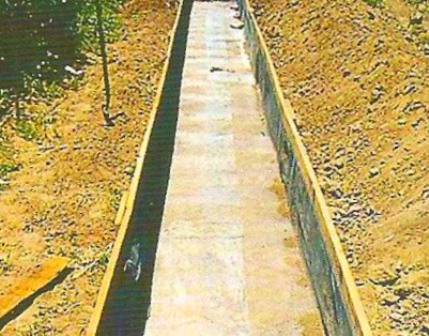 Signs of gopher interference are wilted plants that contain no roots and mounds of fresh, finely powdered looking soil. Moles travel in tunnels that are normally closer to the soil surface than gophers. The soil mounds they form are conical in shape. Moles feed on earthworms and grubs rather than plants. However when forming tunnels, they uproot young plants. Now the secret to protecting each of your plant roots is to line the sides and bottom of the planting holes with ½ inch mesh hardware cloth. Lining your raised beds with hardware cloth is a good solution for your vegetables and will definitely help keep those unwanted pests away. Building Raised Garden BedsIt’s best to construct your beds no wider than 4 feet so that you can get to the middle easily. The length may vary depending on your site and the materials you have available. It’s possible to have beds that are only 8 inches deep; however I recommend a depth of 12 inches for better root growth. When building raised beds, I always design the pathways to be wide enough so that I can easily maneuver a wheelbarrow on them. Wide pathways provide easy access around your beds and can make your gardening tasks easier as well. You can enclose raised beds with…
And
Fill up the beds with some amended native soil or purchased top-soil. In most cases you can enhance the quality of native soil by digging in a 4-6 inch layer of compost or any other organic matter before planting. I had problems where my native soil was too hard to amend easily. So I added some top soil with organic matter. In cases where your native soil is too hard or rocky, add top soil that contains at least 1/3 organic matter by volume. After you fill your raised bed, water well and be well prepared to add a little more soil before planting because some settling can occur. Easy Steps for Building Raised Beds At Home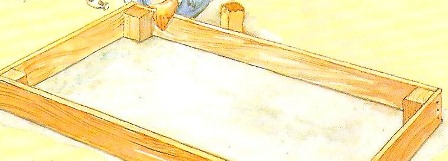 1. If you want to build garden beds with wooden sides that will last long, use rot-resistant redwood or cedar. You can also choose composite lumber made from recycled wood and plastic. 2. Refrain from using pressure-treated wood with chromated copper arsenate (CCA) and creosote-treated railroad ties as these are not very safe near food crops. To make the 4 by 8 foot bed shown in the image below, you’ll need about 3 boards that are 8 feet long, 1 foot wide and 2 inches thick. 3. I recommend thick boards rather than thin as thinner boards are not strong enough. Also get your hands on a 4 foot long 4 by 4 post and about a pound of 12d or 16d galvanized nails. If you’ll like to make your bed longer than 8 feet, you can plan to place stakes or posts along the sides to prevent any bulging. 4. Use 2 of the 8 foot boards for the sides of the bed and cut the remaining board in half to form the ends. To make the corner posts, cut the 4 by 4 into 4 portions where each is 1 foot long. 5. Construct the bed on a hard, level surface like a driveway for example. To form one side, lay one of the 8-foot boards flat and place a corner post under each end and fasten the posts with 4 or 5 nails. Repeat this step with the other 8 foot plank and remaining corner posts. 6. Stand on one of the sides on edge and line one of the end boards up with it. Fasten them with the nails. Nail the other board to insert it in place. Then place the remaining 8 foot side like a sandwich between the end boards and nail it in place to form your box. 7. Carry your box to its permanent location. Use a carpenter’s level to make sure that the top of the box is level. If it’s not, place it aside and dig trenches to lower the sides that may look too high.
|